Understanding Hero Attachment
Within SmarterWX Sentinel, the Hero Attachment setting is used by BYDA members to choose the most important content to display to enquirers.
When users click on a referral, the collated response viewer opens to show the the Hero Attachment by default. This functionality ensures a focused delivery of information, allowing BYDA members to select their preferred default view, be it the response body, a web map, or a specific response attachment.
Why Hero Attachment is Essential
The hero attachment is designed to prioritise important information serving as a default display when enquirers view the collated response viewer. This intentional design ensures that critical details, whether they be safety messages or best practices, take precedence, providing users with immediate access to the most important content.
Configuring Hero Attachment
Members configure their Hero Attachment of choice in the member configuration section of SmarterWX Sentinel.
Step 1: Accessing Hero Attachment Settings
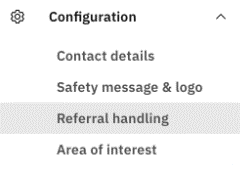
Navigate to the Configuration -> Referral Handling section in the left menu. Within the sandbox test, select the desired channel type to initiate the configuration process.
Use the “Copy from the current active channel” option to create a new configuration based on your current settings.
Step 2: Hero Attachment Section
Locate the Hero Attachment section in the referral configuration page.

Step 3: Choosing Your Default View
Members have three options to choose from:
- Use web map (where available)
- Always use response body
- Always use response attachment
For the third option, members can specify the response attachment filename for a precise default attachment selection.
The attachment is matched based on the filename. You can specify matching criteria for your attachment based on it starting with, ending with or containing a specific string.
For example, if your hero attachment will always have a filename such as “Plans 3456789.pdf” you might choose the “Starts with” option and a string of “Plans”.
More complex matching rules can be configured using the “Regular expression” option. For example, if your hero attachment filename always contains an 8-digit number (such as the job number) you could enter a regular expression of \d{8}\.pdf.
Step 4: Precedence Rules
If your response automation system returns a web map as part of the response, this will always be shown as the default view unless you have disabled the “Use web map (where available)” option.
Where more than one attachment is found that matches your rules, SmarterWX Sentinel will choose any of the attachments to show as the default view.
Where no attachment is found that matches your rules, the response body will be shown to the enquirer (except where a web map is available).
Step 5: Save, Submit, and Verify
Once configured, members can save the draft and submit a sandbox test enquiry to verify the outcome of the Hero Attachment.
Use the “Make active” button to set your new referral configuration live.


