The QGIS desktop mapping application has basic support for consuming the ArcGIS feature layers from SmarterWX Sentinel. This article describes the steps for adding a layer into your QGIS map.
Pre-requisite: Please complete the steps to generate GIS credentials first.
Accessing secured web services in QGIS requires the generation of a authorisation token that must be stored in an EsriToken Authentication Configuration. These steps describe how to create the token and store it in an authentication configuration before adding the layer to your map.
Part 1 – Generate ArcGIS Token
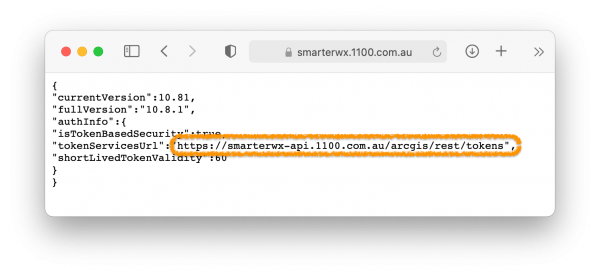
- Click on this link to open the ArcGIS Server info document including the token service URL.
- Locate the attribute called “tokenServicesUrl” and copy the value. (This typically ends with the path /arcgis/rest/tokens).
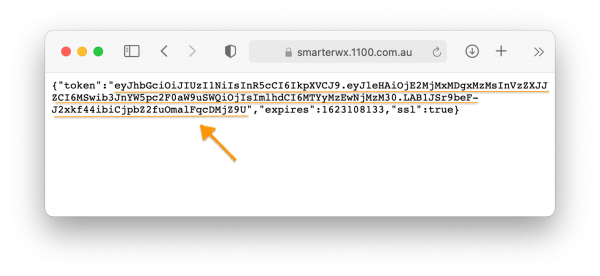
- Using the URL from the previous step enter this in the location bar of your browser along with the GIS credentials you generated earlier. The full URL will look like this https://smarterwx.1100.com.au/api/arcgis/rest/tokens?f=json&username=&password=.
- The response from this request will include a token attribute made up of a random string of letters and numbers. Copy this token value.

Note: SmarterWX Sentinel supports short-lived tokens only. These tokens expire after 60 minutes. You will need to request a new token after this expiry period.
Part 2 – Configure QGIS Authentication
- Open the Settings > Options window.
- Select the Authentication section from the left-hand menu.
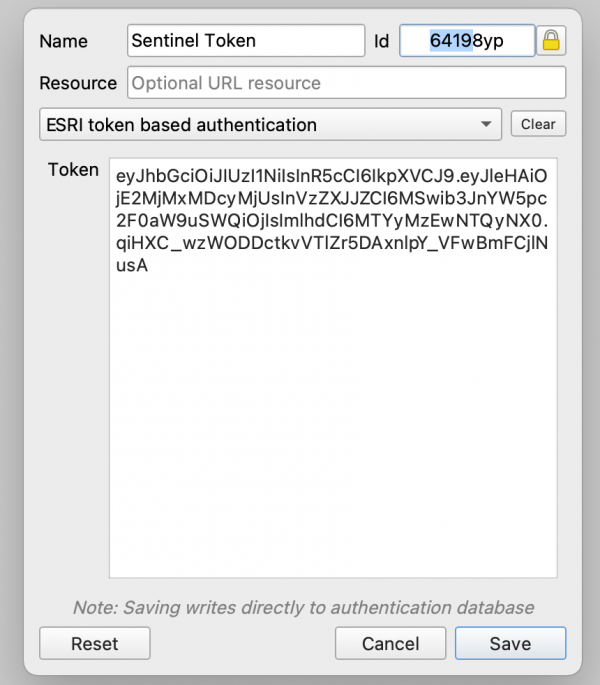
- Click on the + (plus) button to add a new authentication configuration.
- Fill in the form using the type ESRI Token based authentication and paste your token into the space provided.

- Click Save and close the options window.
Part 3 – Add your GIS Layer
-
- In the Browser Panel
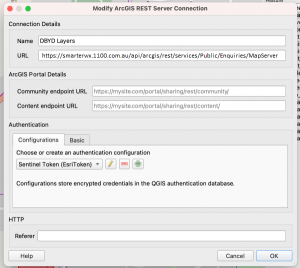
, locate the ArcGIS REST Servers item and right-click to add a New Connection.
- For the URL enter the value, https://smarterwx.1100.com.au/api/arcgis/rest/services/Public/Enquiries/MapServer.
- Under Configurations, add the authentication configuration created in the previous step.

- Click OK to complete the server connection. The new connection will be shown in the Browser Panel.
- Open the server connection to view the available services.
- Open the required service and drag the feature layer on to your map.
- The layer will now be displayed on your map.
Other Options
QGIS support for ArcGIS short-lived token-based authentication isn’t great. A new token must be manually requested each time you work with the feature services. Here are some alternative methods to consider: –
- Esri Resource Proxy – the resource proxy is a small web application that sits between the client and the server. Tokens are automatically generated and added to the server requests by the proxy so that the client does not need to include any authentication credentials.
- Other GIS clients – other applications such as ArcGIS Online, Geocortex, ArcGIS Pro etc will automatically request tokens based using your GIS credentials. The username and password can be stored with the map and the client will fetch fresh tokens whenever needed.


